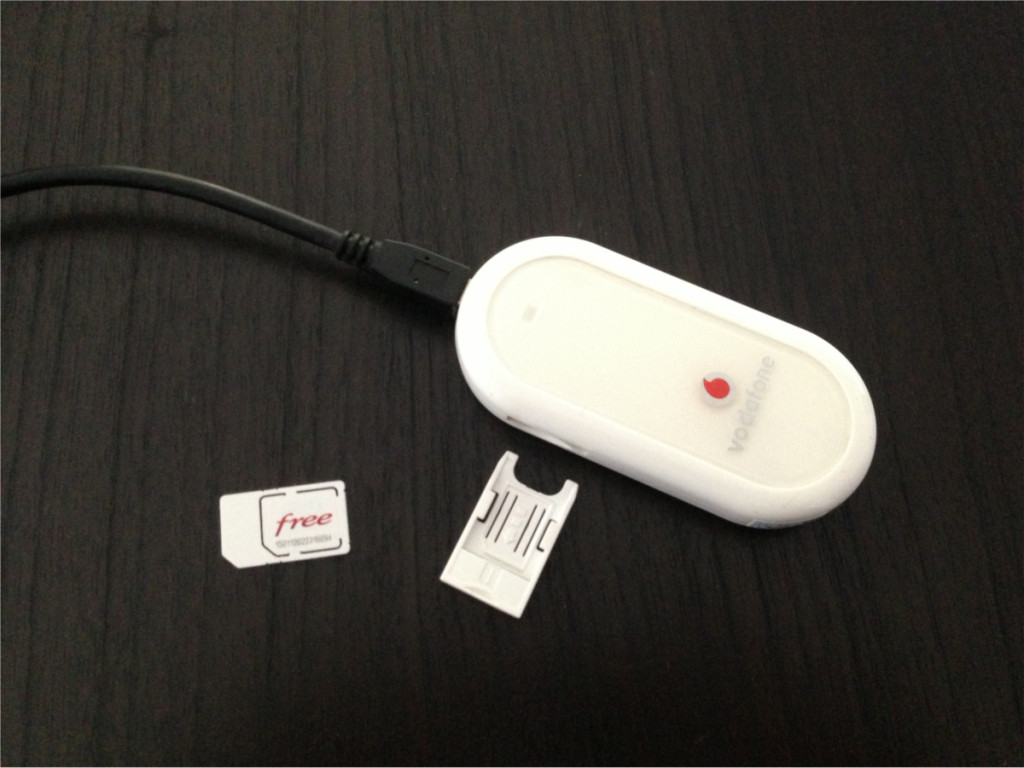
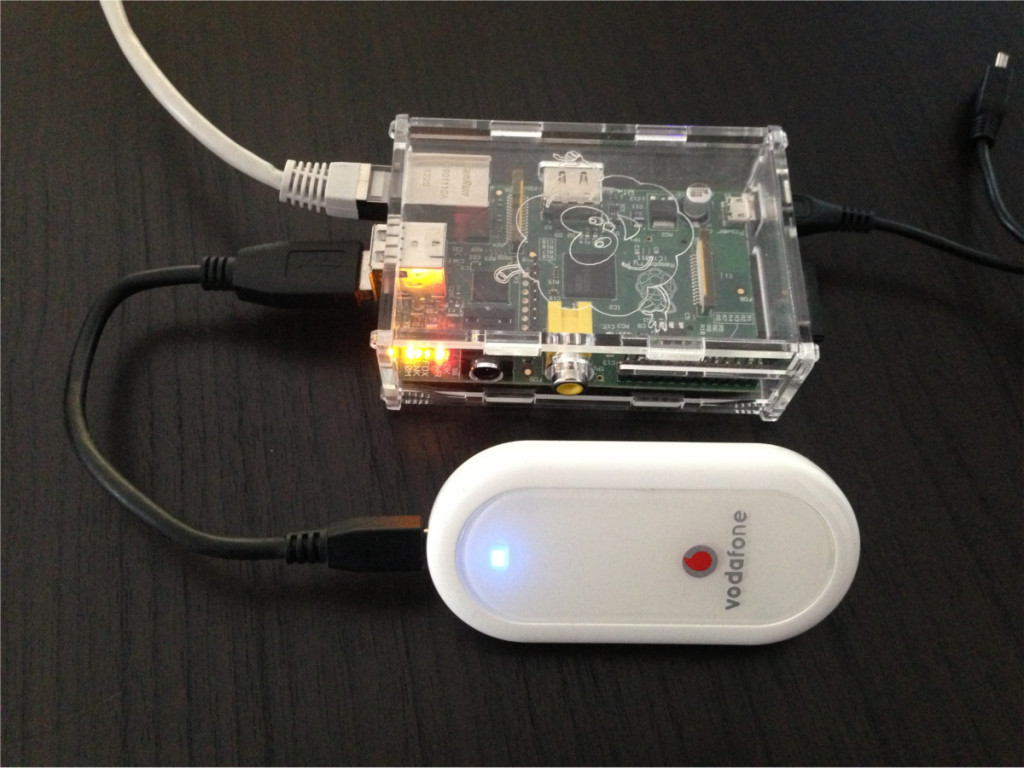
J’ai reçu ce matin mon dongle 3G Huawei E220 🙂 Je dispose déjà d’une carte SIM Free Mobile avec le forfait à 2€. J’active simplement l’option data à 0,99 €, qui prend effet immédiatement.
Vous pouvez trouver ce dongle 3G notamment sur Amazon ici.
Premier test de connexion 3G
Mon Raspberry Pi n’ayant pas encore été livré, je test sur un PC standard sous Linux Mint 14.
Comme prévu, le dongle est immédiatement reconnu par le système :
root@Setebos ~ $ lsusb
Bus 001 Device 002: ID 8087:0024 Intel Corp. Integrated Rate Matching Hub
Bus 002 Device 002: ID 8087:0024 Intel Corp. Integrated Rate Matching Hub
Bus 003 Device 002: ID 24ae:2000
Bus 001 Device 001: ID 1d6b:0002 Linux Foundation 2.0 root hub
Bus 002 Device 001: ID 1d6b:0002 Linux Foundation 2.0 root hub
Bus 003 Device 001: ID 1d6b:0002 Linux Foundation 2.0 root hub
Bus 004 Device 001: ID 1d6b:0003 Linux Foundation 3.0 root hub
Bus 001 Device 005: ID 12d1:1003 Huawei Technologies Co., Ltd. E220 HSDPA Modem / E230/E270/E870 HSDPA/HSUPA Modem
Bus 001 Device 003: ID 046d:c52f Logitech, Inc. Wireless Mouse M305
Passage par le gestionnaire de connexion réseau, avec une configuration minimaliste pour le réseau de Free :
La connexion fonctionne immédiatement, et on constate que nous sommes en itinérance sur le réseau d’Orange 🙂
J’obtiens bien une IP, et je peux surfer 🙂 C’est trop facile !
ppp0      Link encap:Point-to-Point Protocol
          inet addr:10.137.177.43  P-t-P:10.64.64.64  Mask:255.255.255.255
          UP POINTOPOINT RUNNING NOARP MULTICAST  MTU:1500  Metric:1
          RX packets:7 errors:0 dropped:0 overruns:0 frame:0
          TX packets:11 errors:0 dropped:0 overruns:0 carrier:0
          collisions:0 txqueuelen:3
          RX bytes:130 (130.0 B)  TX bytes:223 (223.0 B)
Connexion avec le Raspberry Pi
Comme précédemment, le dongle 3G est reconnu immédiatement :
root@raspberrypi:~# lsusb
Bus 001 Device 001: ID 1d6b:0002 Linux Foundation 2.0 root hub
Bus 001 Device 002: ID 0424:9512 Standard Microsystems Corp.
Bus 001 Device 003: ID 0424:ec00 Standard Microsystems Corp.
Bus 001 Device 005: ID 12d1:1003 Huawei Technologies Co., Ltd. E220 HSDPA Modem / E230/E270/E870 HSDPA/HSUPA Modem
Sur le Pi, il faut installer wvdial heureusement disponible dans les dépots de peu 🙂
Il suffit ensuite de lancer un wvdialconfig :
root@raspberrypi:~# wvdialconf
Editing `/etc/wvdial.conf'.

Scanning your serial ports for a modem.

ttyUSB0<*1>: ATQ0 V1 E1 -- OK
ttyUSB0<*1>: ATQ0 V1 E1 Z -- OK
ttyUSB0<*1>: ATQ0 V1 E1 S0=0 -- OK
ttyUSB0<*1>: ATQ0 V1 E1 S0=0 &C1 -- OK
ttyUSB0<*1>: ATQ0 V1 E1 S0=0 &C1 &D2 -- OK
ttyUSB0<*1>: ATQ0 V1 E1 S0=0 &C1 &D2 +FCLASS=0 -- OK
ttyUSB0<*1>: Modem Identifier: ATI -- Manufacturer: huawei
ttyUSB0<*1>: Speed 9600: AT -- OK
ttyUSB0<*1>: Max speed is 9600; that should be safe.
ttyUSB0<*1>: ATQ0 V1 E1 S0=0 &C1 &D2 +FCLASS=0 -- OK
ttyUSB1<*1>: ATQ0 V1 E1 -- OK
ttyUSB1<*1>: ATQ0 V1 E1 Z -- OK
ttyUSB1<*1>: ATQ0 V1 E1 S0=0 -- OK
ttyUSB1<*1>: ATQ0 V1 E1 S0=0 &C1 -- OK
ttyUSB1<*1>: ATQ0 V1 E1 S0=0 &C1 &D2 -- OK
ttyUSB1<*1>: ATQ0 V1 E1 S0=0 &C1 &D2 +FCLASS=0 -- OK
ttyUSB1<*1>: Modem Identifier: ATI -- Manufacturer: huawei
ttyUSB1<*1>: Speed 9600: AT -- OK
ttyUSB1<*1>: Max speed is 9600; that should be safe.
ttyUSB1<*1>: ATQ0 V1 E1 S0=0 &C1 &D2 +FCLASS=0 -- OK

Found a modem on /dev/ttyUSB0.
Modem configuration written to /etc/wvdial.conf.
ttyUSB0<Info>: Speed 9600; init "ATQ0 V1 E1 S0=0 &C1 &D2 +FCLASS=0"
ttyUSB1<Info>: Speed 9600; init "ATQ0 V1 E1 S0=0 &C1 &D2 +FCLASS=0"
Encore une fois, c’est presque trop facile, tout fonctionne du premier coup 🙂 Voici le fichier de config généré. Tout semble en ordre 🙂
root@raspberrypi:~# cat /etc/wvdial.conf
[Dialer Free]
Init2 = ATZ
Init3 = ATQ0 V1 E1 S0=0 &C1 &D2
Init4 = AT+CGDCONT=1,"IP","free"
Stupid mode = 1
Phone = *99#
New PPPD = yes
Check Def Route = 1
Username = free
Password = free

[Dialer pin]
Init1 = AT

[Dialer Defaults]
Init2 = ATQ0 V1 E1 S0=0 &C1 &D2 +FCLASS=0
Modem Type = Analog Modem
; Phone = <Target Phone Number>
ISDN = 0
; Username = <Your Login Name>
Init1 = ATZ
; Password = <Your Password>
Modem = /dev/ttyUSB0
Baud = 9600
La connexion se fait en utilisant la commande wvdial free, ce qui fonctionne visiblement très bien 🙂
root@raspberrypi:~# wvdial free
--> WvDial: Internet dialer version 1.61
--> Initializing modem.
--> Sending: ATZ
ATZ
OK
--> Sending: ATZ
ATZ
OK
--> Sending: ATQ0 V1 E1 S0=0 &C1 &D2
ATQ0 V1 E1 S0=0 &C1 &D2
OK
--> Sending: AT+CGDCONT=1,"IP","free"
AT+CGDCONT=1,"IP","free"
OK
--> Modem initialized.
--> Configuration does not specify a valid login name.
--> Configuration does not specify a valid password.
root@raspberrypi:~# vim /etc/wvdial.conf
root@raspberrypi:~# wvdial free
--> WvDial: Internet dialer version 1.61
--> Initializing modem.
--> Sending: ATZ
ATZ
OK
--> Sending: ATZ
ATZ
OK
--> Sending: ATQ0 V1 E1 S0=0 &C1 &D2
ATQ0 V1 E1 S0=0 &C1 &D2
OK
--> Sending: AT+CGDCONT=1,"IP","free"
AT+CGDCONT=1,"IP","free"
OK
--> Modem initialized.
--> Sending: ATDT*99#
--> Waiting for carrier.
ATDT*99#
CONNECT
--> Carrier detected.  Starting PPP immediately.
--> Starting pppd at Fri Mar 15 19:58:31 2013
--> Pid of pppd: 2323
--> Using interface ppp0
[...]
--> local  IP address 10.64.148.255
--> remote IP address 10.64.64.64
--> primary   DNS address 212.27.40.240
--> secondary DNS address 212.27.40.24
Connecter mon Raspberry Pi au réseau 3G est pour le moment l’opération la plus simple du projet 🙂


